
Procreate is a powerful digital drawing app that allows artists to bring their imaginations to life. One of the most exciting features of Procreate is the ability to create custom brushes, giving you complete control over your artistic tools. In this tutorial, we will walk you through the process on how to create your own brush on Procreate, allowing you to personalize your artwork and take your creativity to new heights.
Don’t forget to download the brush I created for free here, and you can also buy the whole bundle in the shop section! If you want to receive the freebies before anyone else, subscribe to our weekly newsletters!

Create Your Own Brush On Procreate
Customize An Existing Brush
Procreate has over 200 ready-to-use brushes already installed in the app. You can select any of these brushes and customize them to your liking.
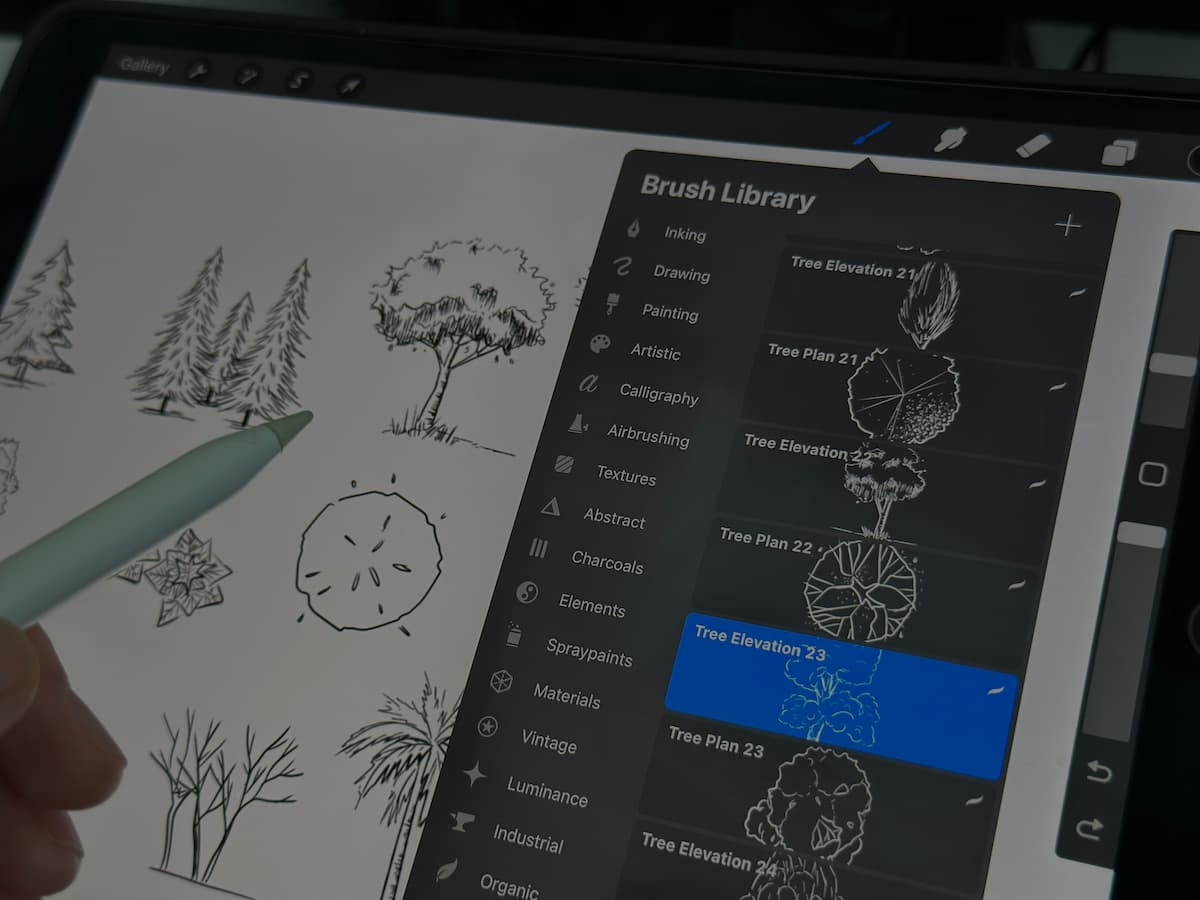
Open Procreate on your iPad and start a new canvas or open an existing one. Choose an existing brush from the default Procreate brushes that closely resembles the type of brush you want to create.
Tap on the brush to open the Brush Studio, where you can adjust various settings. Experiment with the different settings like brush shape, stroke path, taper and rendering to modify the brush as you want.
Once you’re satisfied with the changes, tap on the “+” icon in the top left corner of the Brush Studio to save your modified brush as a new brush.

Start From Scratch With A New Brush
Now, let’s start creating a brush completely from scratch.
So I have sketched 48 trees and that took me a lot of time by the way, and they are finally ready. You can download them here if you want.

First, create a new brush set and name it as you want. Now, select the image you want to make as a brush. If you go to action, you can copy the image by tapping on ‘’copy canvas’’. Now, go to the brush set you just created, and tap on the “+” on the top right corner. You’ll be presented with a wide range of settings to customize your brush.
Go to ‘’shape’’. Tap ‘’edit’’, and then ‘’import’’, and ‘’paste’’. Tap the screen with two fingers. And voila!
Play around with the sliders and options to find the perfect combination. Go to ‘’stroke path’’ and make the ‘’spacing’’ sliders 100%. Then go to ‘’Apple Pencil’’ and make the opacity 100%. And in ‘’properties’’, enable ‘’use stamp preview’’.

To ensure your brush feels just right, use the drawing pad below the settings to test your brush strokes in real-time. I like to make the preview size around 15% and make the size the maximum I can. Finally go to ‘’about this brush’’ tap, write the name of the brush and your name.
Adjust the sliders and parameters to fine-tune your brush’s behavior until you achieve the desired effect. Don’t be afraid to experiment with different combinations and settings; this is where the magic happens!
Please watch the YouTube video I have made directly for this as this will be easier for you to understand.

Create Your Own Brush On Procreate
Naming and Exporting Your Brushes
Once you’re satisfied with your custom brush, tap on ”done” on the top right corner. Give your brush a unique and descriptive name, so it’s easy to identify it in the future. To keep your brushes organized, you can assign them to specific brush sets or create new sets for different types of brushes.
If you wish to share your custom brushes with others or use them on different devices, you can export them as .brush files.
To export a brush, swipe left on it in the Brush Library and tap “Share.” Select “Export” to save the brush as a .brush file, which can be shared via email or cloud storage.

Import Brushes
If you don’t want to create your own brushes and you prefer to buy them from some artists you are following, that’s also great as this will save your time, provide professional quality, offer a variety of styles, you will also receive updates, and this is often affordable and easy to use.
For example, if you want to import my free tree brushes, here is how you can install them:
- Download the Brushes: Find the brushes you want to install. They may come in individual files or as a brush set in a .brushset file format.
- Locate the Files: Make sure you can access the downloaded brush files on your device. If you downloaded them on your computer, you may need to transfer the files to your iPad or iPhone.
- Import to Procreate:
- Open Procreate on your iPad.
- Tap the “+” icon in the top-right corner of the Brush Library.
- On the top right, select “Import” and then “Files.”
- Navigate to the location where you saved the individual .brush files and tap on the one you want to import.
- Verify the Installation: After importing, go back to Procreate. You should see the newly imported brushes at the top of your Brush Library.
Congratulations! You’ve unlocked a whole new level of creativity by creating your own custom brushes on Procreate. With the ability to fine-tune your brushes to your exact specifications, you’ll be able to add a unique touch to your artwork and bring your artistic ideas to life like never before. So, go ahead and experiment, explore, and have fun!
That’s all for now. Don’t forget to show me if you try creating brushes. Also, check out my Youtube channel for more interesting videos. If you want more, you can find my other posts here.
I also share stuffs on Instagram. Feel free to come to say hi!

Hey friends,
I’m Nur. I’m an architect and illustrator.
On this site, we explore the techniques, tools, and inspirations that fuel our creative journeys.
And over at Creative Sunday – my weekly newsletter – I share motivational tips for enhancing creativity and practical advice for navigating the artistic path. Sign up below to join a growing community of more than 1000 design enthusiasts.
Create Your Own Brush On Procreate